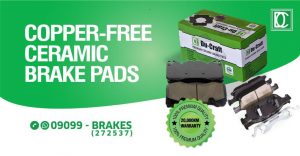
Thanks for your interest in Du-Craft Premium Ceramic Brake Pads, a range of high performance brake pads that deliver smooth, stable and quiet braking force at varying driving temperatures.
Optimal braking performance is required to bring your moving vehicle to a safe stop. And one critical part of the braking system that’s relied upon to deliver that performance on a vehicle is a set of high quality brake pads with good friction properties to effectively control Noise, Vibration and Harshness during braking.
Having purchasing a set of high performance brake pads, the next most important thing is to have your product properly installed.
The 10 proper brake pad installation tips below will therefore help you or your mechanic to achieve a proper installation that will potentially prolong and maximize the service life of your high performance Brake Pads.
Please take time to read and observe these tips during your brake pad installation.
1. Before installing your new brake pads, please look out for any form of uneven wear on your old pads. Uneven wear patterns indicate areas of problems in your calipers(check your caliper slide pins or pistons).
2. Lubricate the slide(guide) pins on your calipers with a silicone based brake lubricant on the slide pins.
Please note that any petroleum based lubricant will eat up the rubber dust boots on the neck of the slide pin and leave your pins exposed to road debris that could cause your calipers to become jammed sooner than later.
3. Lubricate you caliper slide clips.
These clips are at the top and bottom of the brake pad channel on the caliper brackets. They form a track for the brake pad’s back and forth movement. Any form of rust on them hinders the free movement of pads and causes squeals from increased pad vibration.
4. Inspect your brake discs for grooves, scars or warps.
Ensuring that your disc surface is smooth on both sides is key to smooth, noiseless braking and brake pad longevity.
5. If your discs are grooved, warped or scarred, you may resurface or replace them in pairs. It’s important that you ensure that you measure the disc thickness with a micrometer before resurfacing. Discs have minimum surface thickness that must be maintained for safe and smooth braking. If you aren’t sure of your disc thickness, it’s safe to replace them.
6. Before pressing back your caliper pistons during pad installation, ensure that the outer walls of your pistons are cleaned to remove brake dust and road debris that could cause your caliper pistons to get stuck and cause your pads to wear unevenly and prematurely.
7. After reassembling the calipers and fitting them in position, test again to ensure that they are sliding horizontally along the caliper slide pins after lubricating the slide pins.
8. Ensure that the brake line bleeder valves on the calipers are not rusty and blocked.
9. Test your brake fluids with a good brake fluid tester strip or electronic tester tool to determine that the water, copper and corrosion levels of your fluid are within acceptable limits.
If your brake fluid has been in there for two years, please drain it completely and replace with a good Dot3, Dot4LV or Dot5.1 specification fluid(cars not equipped with ABS should use only Dot5 specification fluid).
10. Lastly, bleed your brake lines to rid them of any form of air.
NB: Remember that servicing your brake system checked and once in 6months or every 10,000kilometers helps to keeps your brake system functioning optimally, prolonging your brake pad and disc service life and ultimately keeping you safer on the road.
It’s great to move your vehicle, but far greater and vital to stop it safely, with lower disc abrasion! Visit www.du-craftbrakes.com to learn more!

